Building a seating chart
Draw your room once in the studio, from rows and tables to the stage and the bar, and reuse it for every event at that venue.
9 min readChecked against the live platform on 26 July 2026
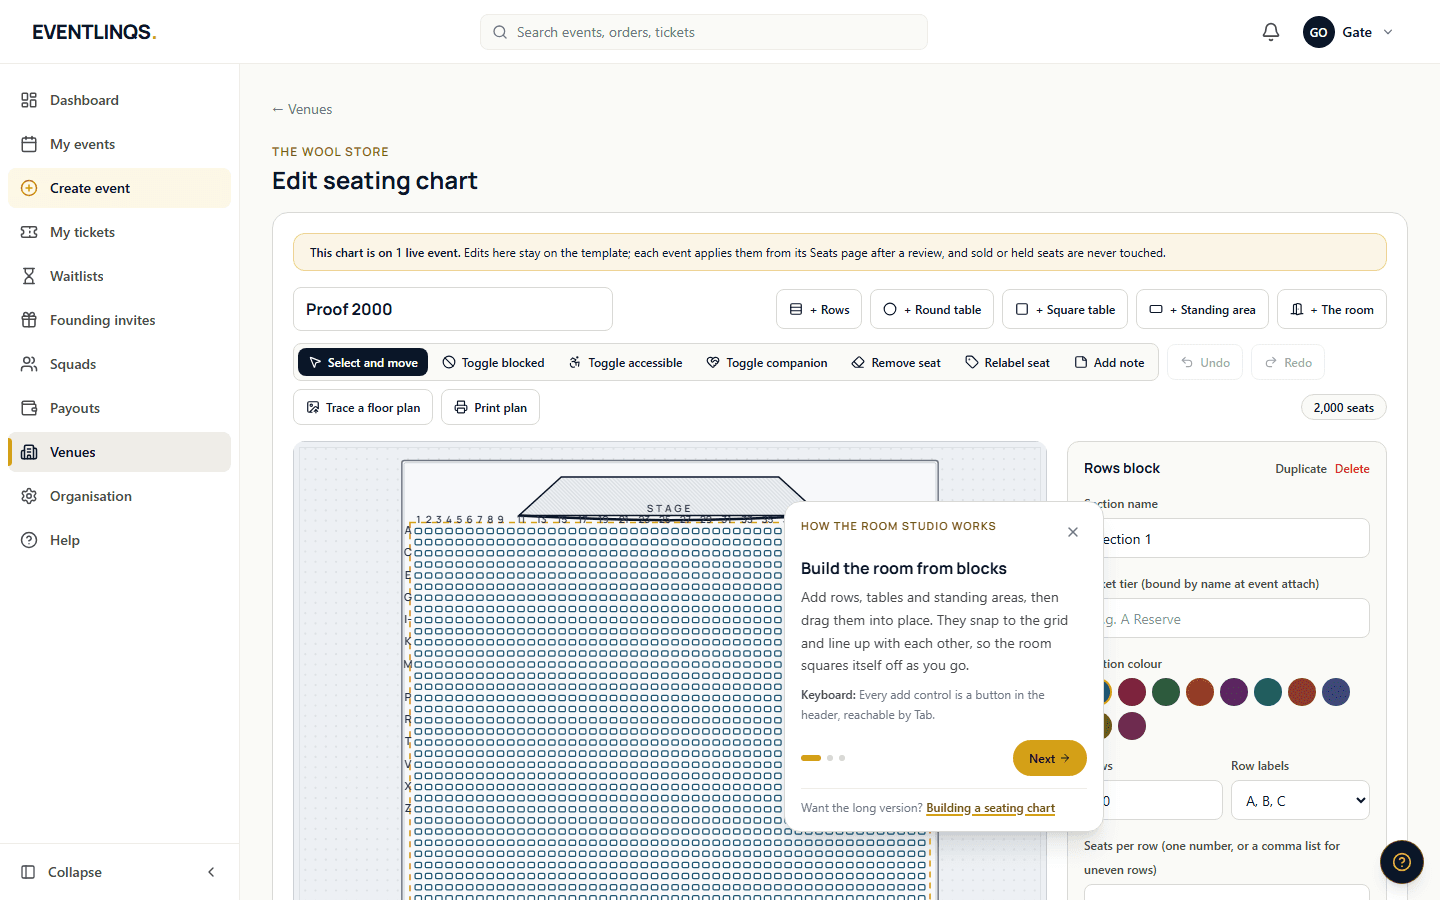
A seating chart belongs to a venue, not to an event. You draw the room once and every event you run there can apply it. That is the whole point: the second show at the same venue costs you no drawing at all.
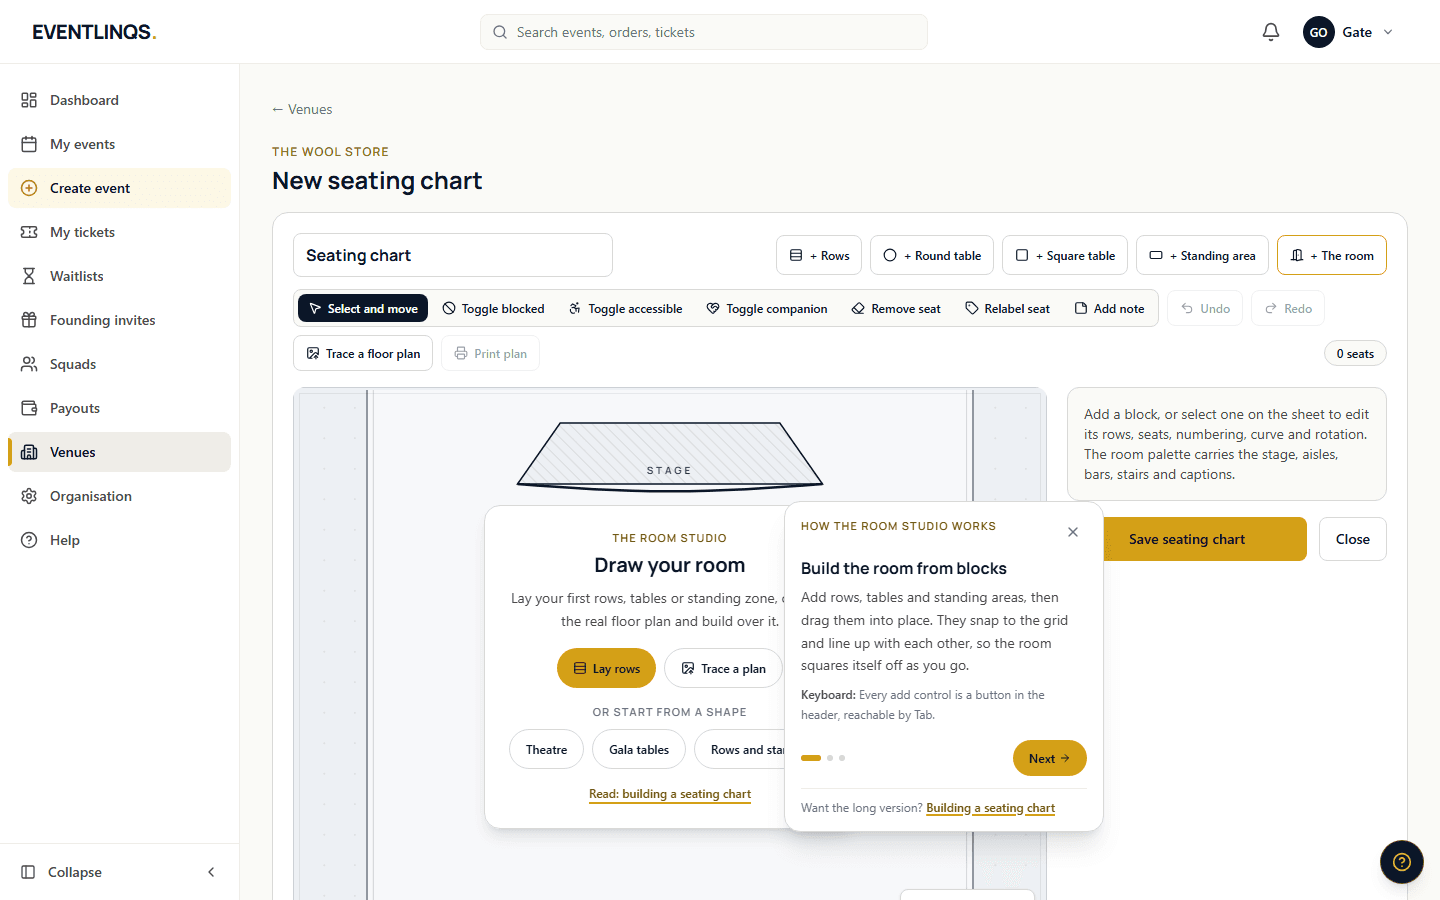
Open Venues from the dashboard, choose the venue, and open its seating charts. A new chart opens the room studio on an empty sheet.
Start from a shape, or start from the real plan
The empty sheet offers three starting shapes: Theatre, Gala tables, and Rows and standing. Each one lays a sensible room you then reshape, which is faster than building from nothing. If you have the venue floor plan as an image, choose Trace a plan instead: the plan drops in as a dimmed underlay and you build your rows directly over the real geometry. The underlay is a guide only and never becomes part of the chart.
The blocks you build with
Rows
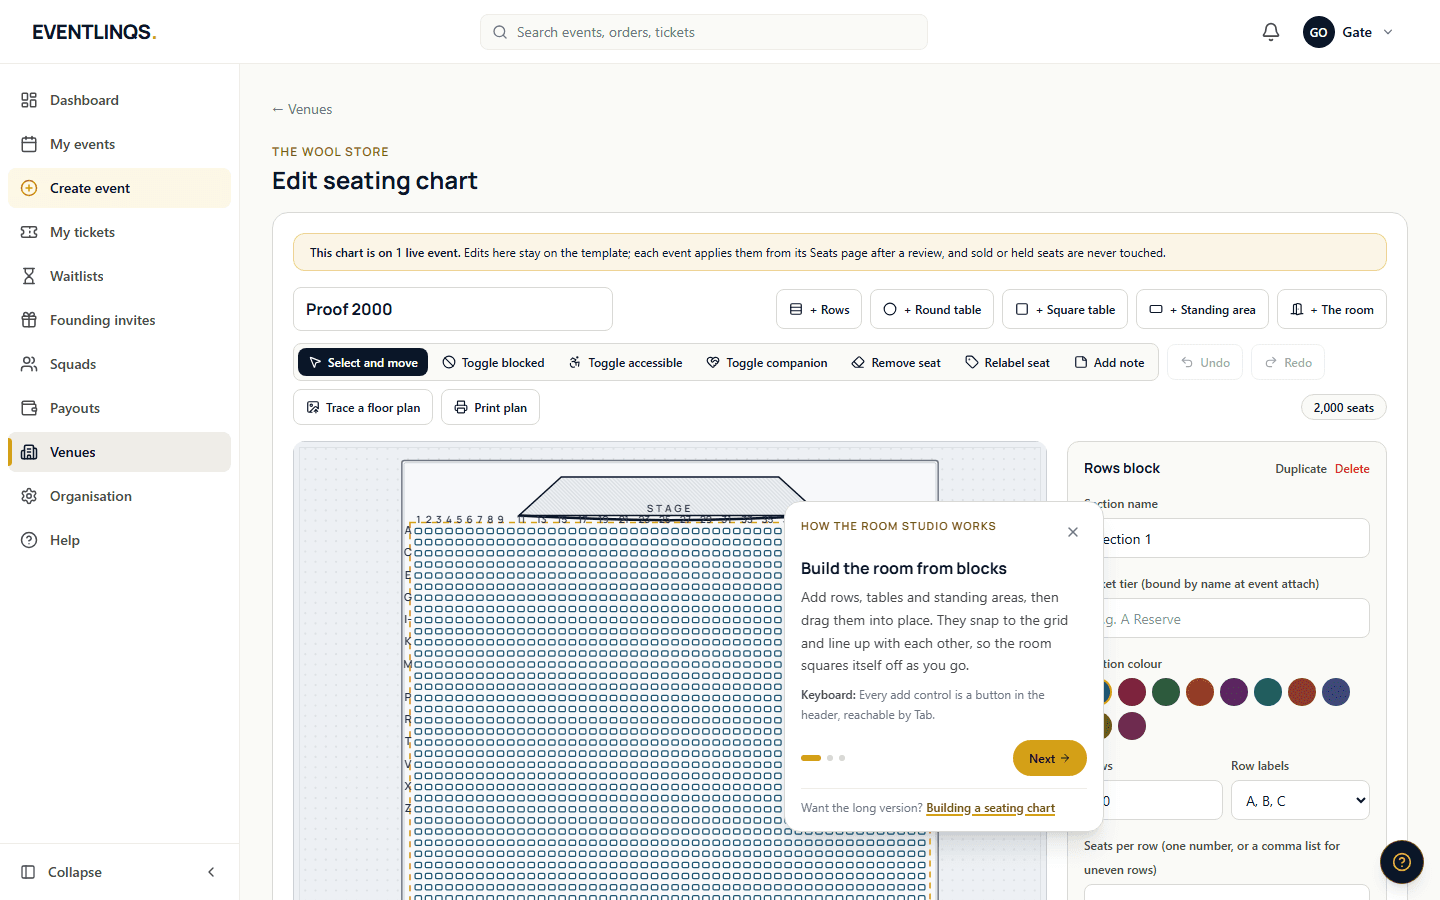
The workhorse. Set how many rows and how many seats per row, then bow them. The bow slider under the sheet curves the rows toward the stage, and Arc wraps them around it. A slight bow reads far more like a real room than a rigid grid, and it helps buyers understand where they are sitting.
Round and square tables
For galas, dinners and awards nights. Set the seats per table and drop as many as the room holds. Tables label themselves as tables rather than rows, and the buyer map lets a guest take a whole table in one action.
Standing area
A zone rather than seats. It sells through its own general admission ticket type at that ticket type capacity, so it never creates individual seats. Use it for the floor, the back bar, the lawn.
The room
Under the Room menu: the stage with its shape, aisles that punch a walkway through rows, and the venue objects that make a plan legible, along with text captions and standalone icons. A bar, a door and an exit sign do more for buyer confidence than another row of seats.
Marking individual seats
The seat tools in the toolbar switch the sheet from moving blocks to marking seats. Choose a tool and click seats on the plan. You can block a seat so it never sells, mark it accessible, mark it as a companion seat beside an accessible one, remove it entirely where the room has a pillar, relabel it when the venue numbers oddly, or add a note that only you see.
- Blocked seats stay visible on the buyer map but cannot be chosen, which is the honest way to show a restricted view or a held seat.
- Accessible and companion seats are drawn with their own marks so a buyer can find them without asking.
- Removing a seat is for geometry that does not exist. Blocking is for a seat that exists but is not for sale.
Check it the way a buyer will
Before you save, zoom to fit and look at the whole room. Then zoom in as far as a buyer on a phone would. Seat numbers should be readable, the stage should be obviously the stage, and no label should sit on top of a chair. If a section is hard to read at a glance, it will be harder on a phone at the moment of buying.
The toolbar also prints. The print export gives you a clean line drawing of the room for the venue, the door team, or the run sheet.
Save the chart, then apply it to an event from that event Seats page. The next thing to get right is which ticket type each section sells at, which is its own short guide.
Read next
Seating and rooms
Mapping ticket tiers to seats
How a section on your chart becomes a price on a seat, why the match is by name, and how to catch the one mistake that quietly sells your best seats cheap.
6 min read
Set up your event
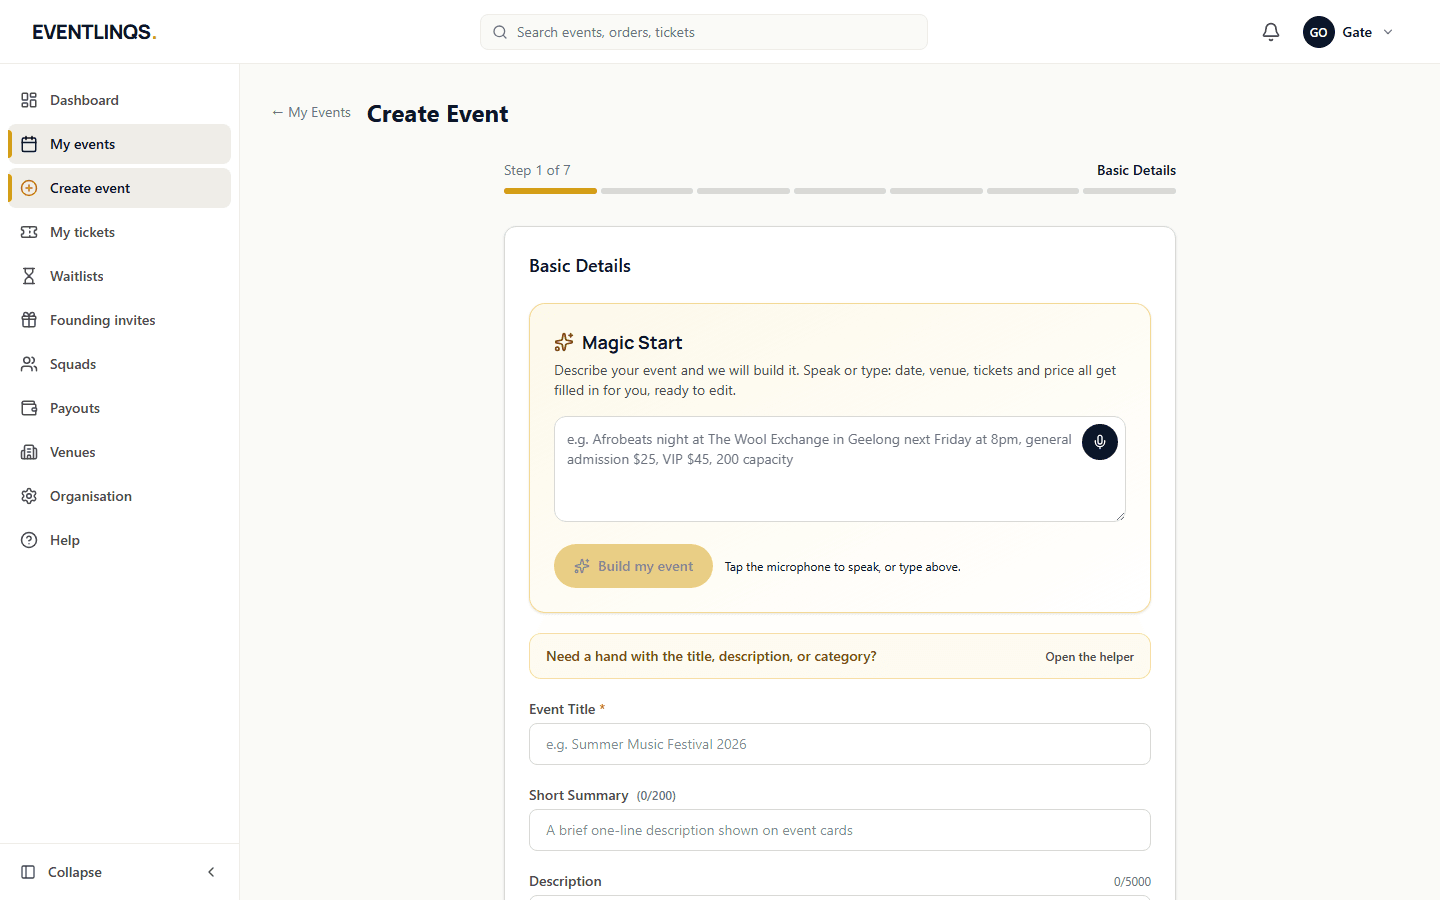
Creating your first event
The seven steps from an empty dashboard to an event page that is ready to publish, and what to get right at each one.
7 min read
Event day
Running the door with the QR scanner
Set your door team up, scan tickets on any phone, and understand every decision the scanner gives you before the queue is out the door.
7 min read
Does this match what you are seeing?
These guides are checked against the running platform, and every screenshot on this page was taken from it. If a screen has moved since, tell us and we will correct the guide as well as help you.